
 zhangyan
d73fd165b0
[bsp/phytium]Code Update and Refactoring (#8247)
zhangyan
d73fd165b0
[bsp/phytium]Code Update and Refactoring (#8247)
|
1 year ago | |
|---|---|---|
| .. | ||
| applications | 1 year ago | |
| boot | 1 year ago | |
| configs | 1 year ago | |
| figures | 1 year ago | |
| .config | 1 year ago | |
| .configs | 2 years ago | |
| Kconfig | 1 year ago | |
| README.md | 1 year ago | |
| SConscript | 1 year ago | |
| SConstruct | 1 year ago | |
| export_project.py | 2 years ago | |
| link.lds | 2 years ago | |
| link_smart.lds | 2 years ago | |
| makefile | 1 year ago | |
| rtconfig.h | 1 year ago | |
| rtconfig.py | 1 year ago | |
README.md
AARCH32 工作模式使用
- 当开发者需要基于 Phytium 系列芯片进行开发时,可以从以下几个步骤出发配置芯片
1. 准备编译环境
创建tools目录,在 tools 目录下下载两个python 脚本,get_toolchain.py 和 ci.py,下载完后给两个脚本添加执行权限
mkdir tools
cd ./tools
wget https://gitee.com/rtthread/ART-Pi-smart/raw/master/tools/get_toolchain.py
wget https://gitee.com/rtthread/ART-Pi-smart/raw/master/tools/ci.py
chmod +x get_toolchain.py ci.py
运行 get_toolchain.py 脚本,拉取 aarch32 交叉编译链
arm-linux-musleabi_for_x86_64-pc-linux-gnupython3 ./get_toolchain.py arm
RT-Thread 5.0 后必须使用这个带 musl-libc 的编译链,不能使用
arm-none-eabi
在 aarch32 目录下下载脚本 smart-env.sh ,然后运行脚本生效环境变量
cd ./aarch32
wget https://gitee.com/rtthread/ART-Pi-smart/raw/master/smart-env.sh
source ./smart-env.sh arm
如下所示是 aarch32 编译相关的环境变量,运行 scons 前要确保环境变量设置正确

NOTE
以上步骤已在ubuntu20.04开发环境测试,在其他开发环境下若无法下载相关脚本,可使用以下链接手动下载
    get_toolchain.py下载地址
    https://gitee.com/rtthread/ART-Pi-smart/blob/master/tools/get_toolchain.py

    ci.py下载地址
    https://gitee.com/rtthread/ART-Pi-smart/blob/master/tools/ci.py

    当出现以下提示时,可采用以下链接下载 phytium_standalone_sdk_install.py
    "Please refer to the ./README and manual download phytium_standalone_sdk_install.py, place in current folder"
    phytium_standalone_sdk_install.py下载地址
    https://gitee.com/phytium_embedded/phytium-standalone-sdk/blob/Standalone-Sdk_RT-thread/phytium_standalone_sdk_install.py
2. 如何选择开发板
以 E2000Q RT-Smart为例,Linux 环境下,运行 make load_e2000q_demo_rtsmart 加载默认的 rtconfig, 然后输入下列命令,进入 menuconfig 进一步配置,
scons --menuconfig
开发者通过以下选择进行配置
Standalone Setting > Board Configuration > Chip

3. 如何选择驱动
scons --menuconfig
开发者通过以下选项进行驱动的使能
Hardware Drivers > On-chip Peripheral Drivers

4. 开启SDK中内部调试信息
scons --menuconfig
开发者通过以下选项进行调试信息等级的设置

5. 如何切换至RT-Thread Smart 工作模式
scons --menuconfig

开发者通过以上配置开启RT-Thread Smart 功能
6. 编译程序
    scons -c
    scons
完成编译之后目录下将会生成以下几个文件
rtthread_a32.bin
rtthread_a32.elf
rtthread_a32.map
7. 启动镜像程序
可以用串口通过 XMODEM 协议将 bin/elf 文件上传到开发板,然后启动,
如果使用 SD-1 控制器
mw.l 0x32b31178 0x1f首先在 Phytium 开发板上输入,上传 bin 文件
loadx 80080000

加载 bin 文件完成后,输入下列命令启动
go 80080000
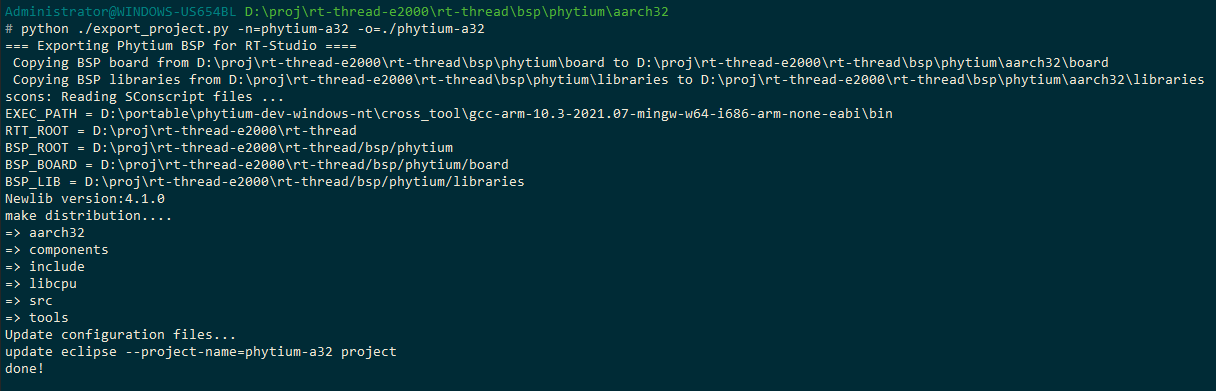
8. 打包导出工程源代码
指定工程名和路径,打包RT-Thread内核和Phytium BSP代码,可以导出一个工程工程
python ./export_project.py -n=phytium-a32 -o=D:/proj/rt-thread-e2000/phytium-a32
- 进入打包工程的目录,修改工程根目录 Kconfig 中的路径 BSP_DIR 和 STANDALONE_DIR
env 环境中的 menuconfig 不会调用 SConstruct 修改路径环境变量,因此需要手动修改路径
config BSP_DIR
    string
    option env="BSP_ROOT"
    default "."

config STANDALONE_DIR
    string
    option env="STANDALONE_DIR"
    default "libraries/standalone"
- 输入 menuconfig 和 scons 完成编译
9. 将工程导入 RT-Studio
- 在 RT-Studio 使用功能
RT-Thread Bsp 到工作空间,导入 5. 中导出的 BSP 工程 - 设置 BSP 工程的交叉编译链后进行后续开发

python get_toolchain.py arm ./smart-env.bat